Cisco Catalyst Center (Formerly Cisco DNA Center)
Feature Overview
The Cisco Support Assistant Extension offers a set of tailored features for the Cisco Catalyst Center to enhance troubleshooting and support operations. This documentation covers four key features: file uploads, screen recording, HAR logs capture, case opening directly from the troubleshooting section, general case opening, and smart tips within the portal.
Explore detailed explanations of these use cases in the section titled "Use Cases".
Supported Versions for the Extension on the Cisco Catalyst Center
The extension has been optimized for versions 2.3.5.5, 2.3.5.6, 2.3.7.5, and 2.3.7.6. With other Catalyst Center versions, the extension will work on a best-effort basis. The extension needs to be version 1.14.0 or above for it to detect the Catalyst Center.
Use Cases
Multiple use cases have been enabled for the Catalyst Center, with many more use cases currently in development. The use cases will enhance the overall support experience and simplify the troubleshooting experience.
Use Case 1: Open a New Cisco Support Case
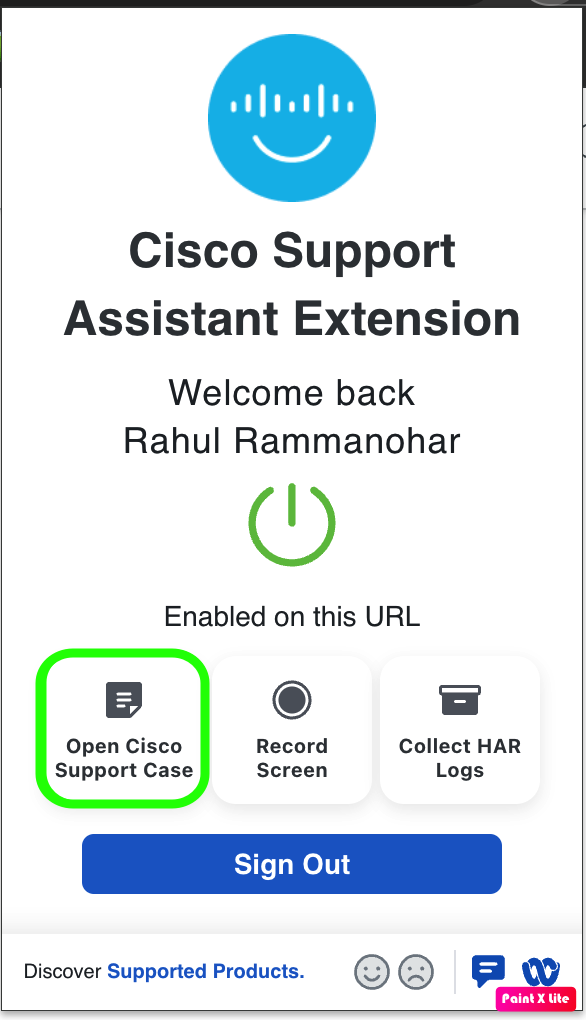
Step 1: A new support case can be created by clicking on 'Open Cisco Support Case' from the extension pop-up, as highlighted in the image below.
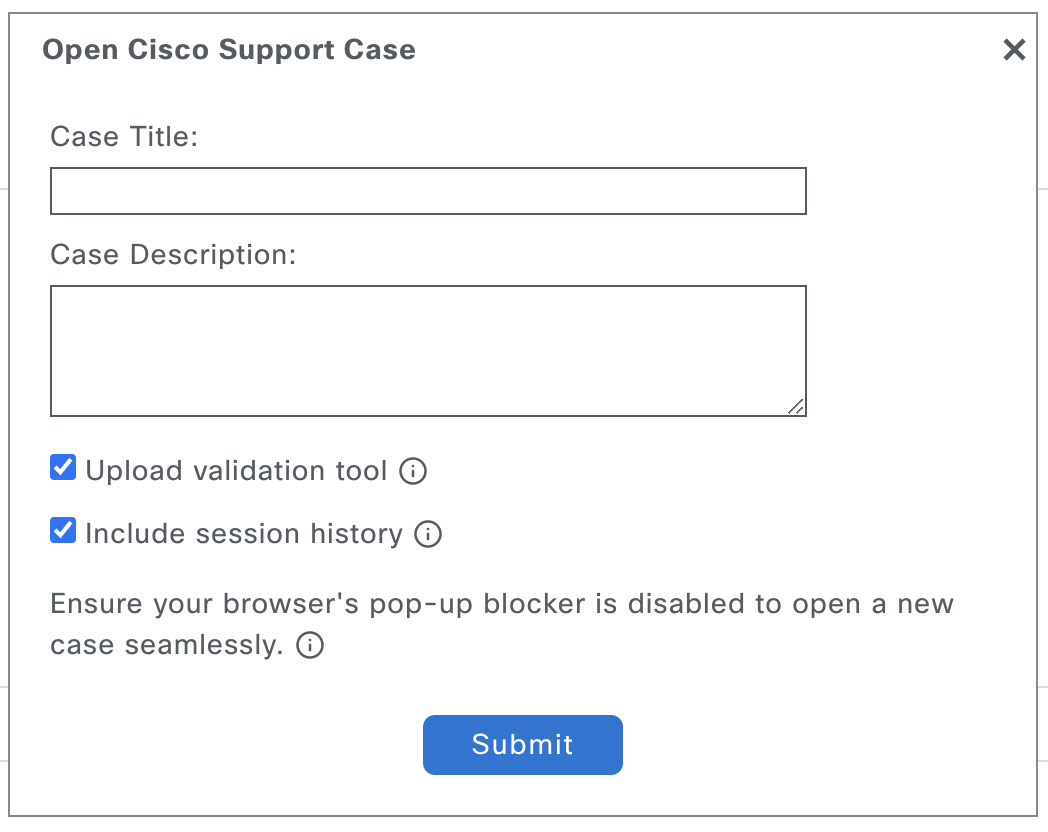
Step 2: A new pop-up appears requesting additional information for the case, including the case title and description. Two options are provided:
- The output PDF of a fresh validation run (including all the checks) can be added to the case (optional), which would be very useful for the Cisco TAC engineer to get a quick understanding of the deployment and any issues that might be found by the checks.
- A second option is to include the session history of the browser as part of the case description.
Please Note:
- Additional data from the Catalyst Center is automatically added to the case, which includes the serial number, member ID, and software version.
- Ensure that the pop-up blocker is disabled to ensure the new case is created seamlessly.
Step 3: A new tab is opened, redirecting to the Cisco Support Manager to complete the case creation process.

Use Case 2: Record Screen
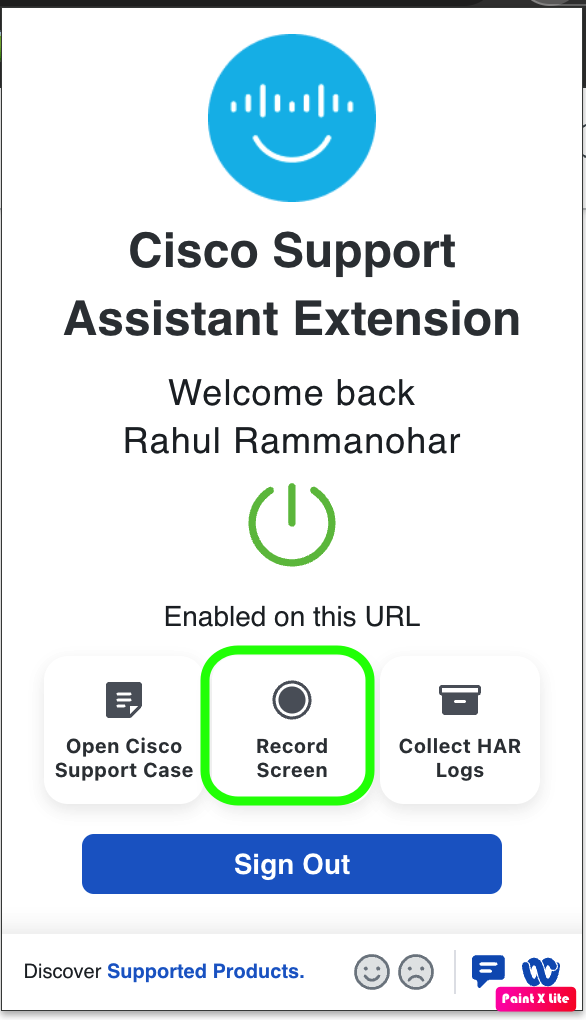
Step 1: Using this feature, the steps to reproduce an issue can be captured along with audio. Also, this feature is useful to record a message for the TAC engineer. By clicking on 'Record Screen' from the extension pop-up (highlighted in the image below), a video recording of a chosen screen or only a chosen tab can be recorded along with audio and uploaded to the support case.
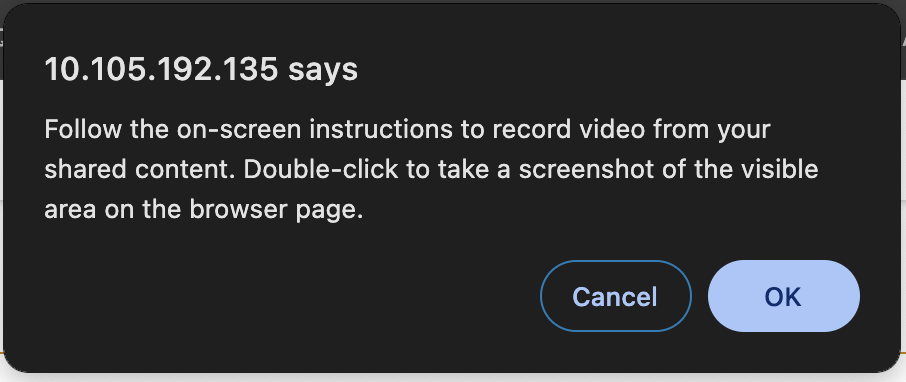
Step 2: A pop-up requesting permission to continue will show up. Click on OK to start the screen recording.
Step 3: Choose whether you want to record a tab, a window, or select an entire screen in the next new pop-up.
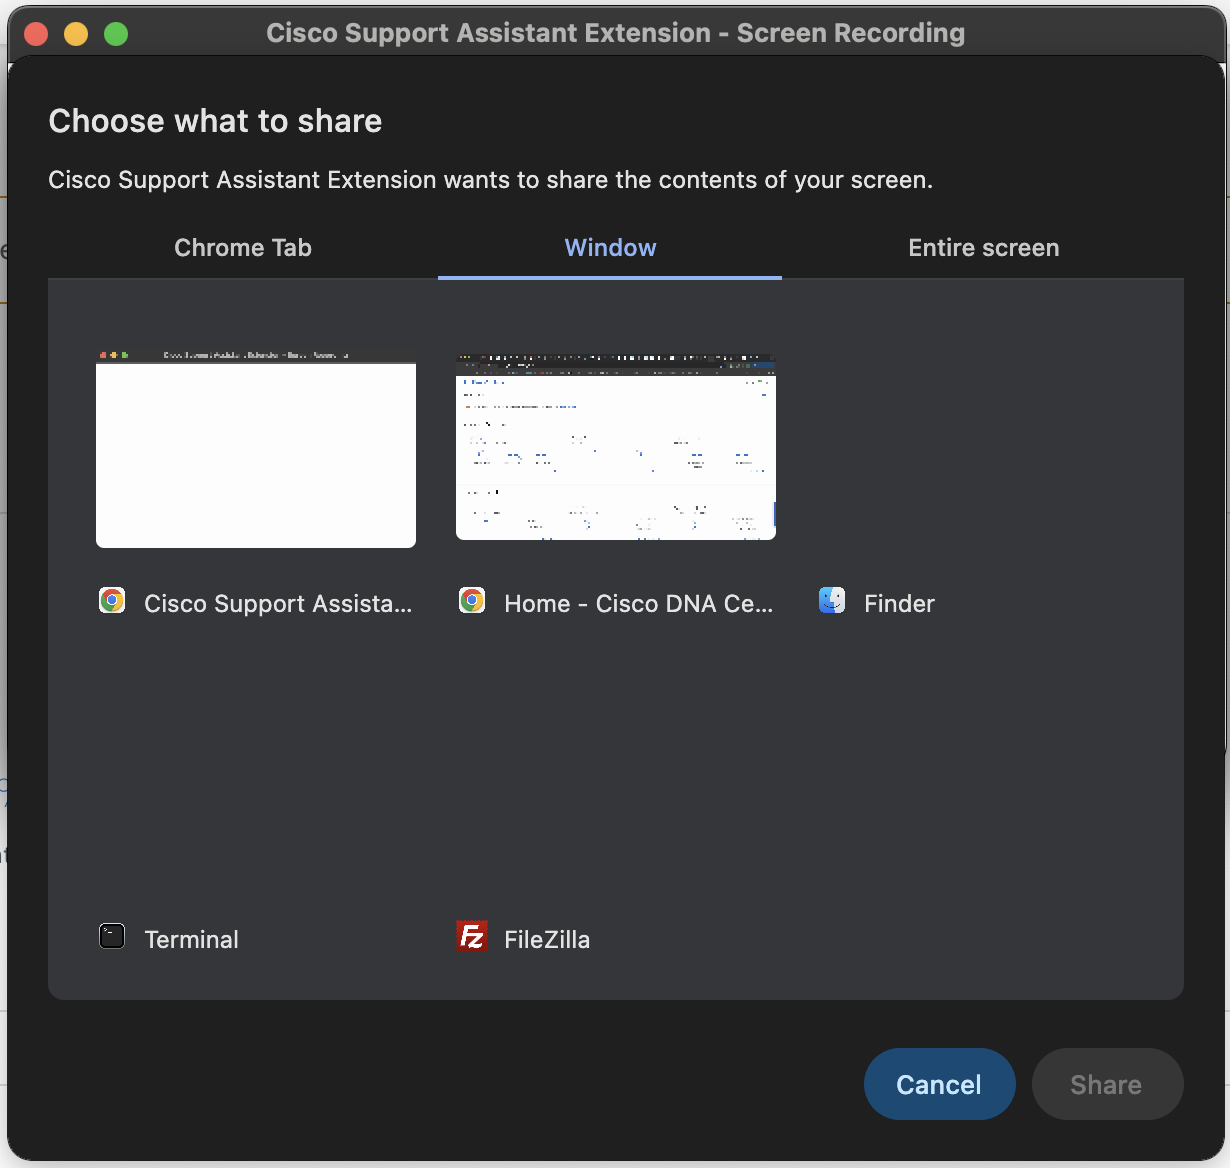
Step 4: The video is now being recorded along with the audio. A bar will be present at the top of the tab with an option to stop the recording.

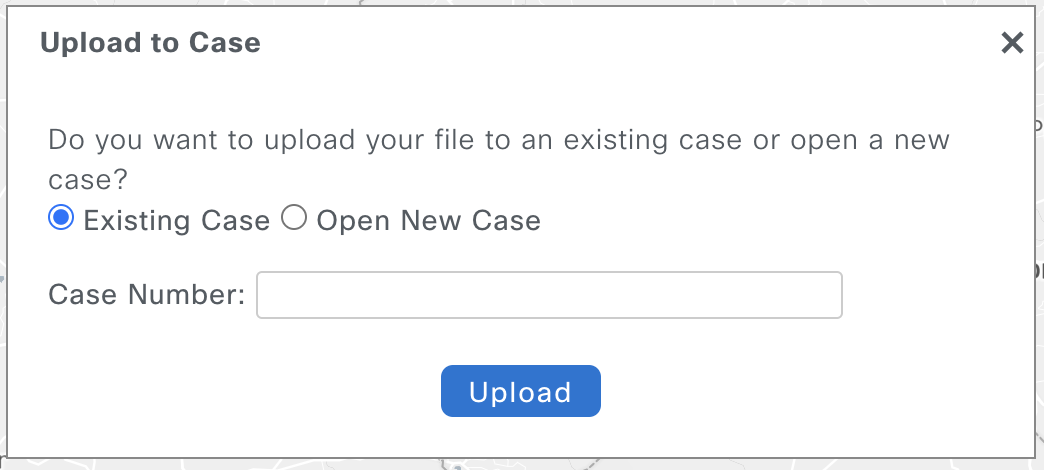
Step 5: As soon as the recording stops, a new pop-up opens up with the option to either upload the recorded file to an existing support case or to a new one.
Use Case 3: Collecting HAR Logs
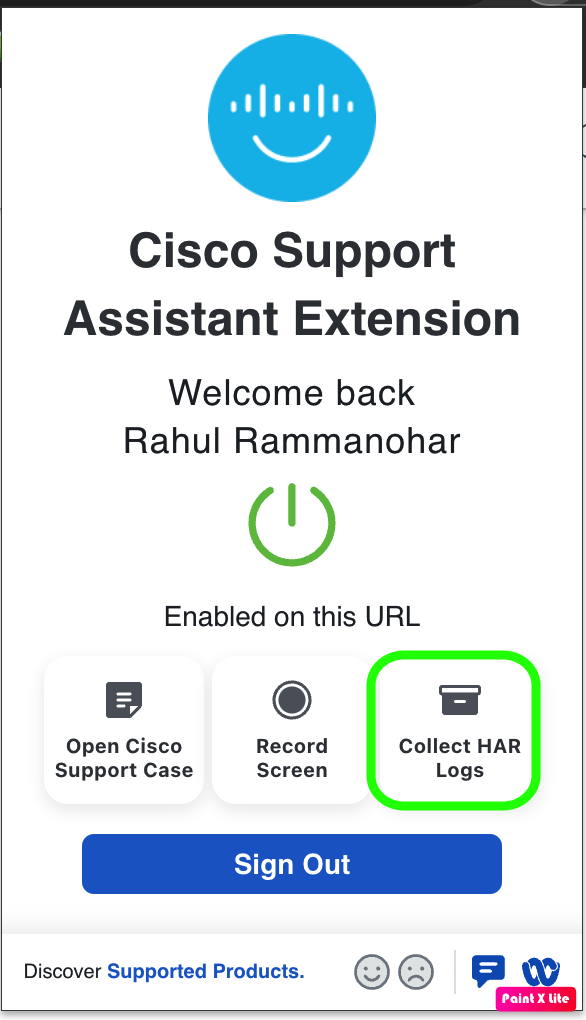
Step 1: Collecting HAR logs is required to troubleshoot UI-related issues. The HAR logs are captured by clicking on 'Collect HAR Logs' from the extension pop-up, as highlighted in the image below.
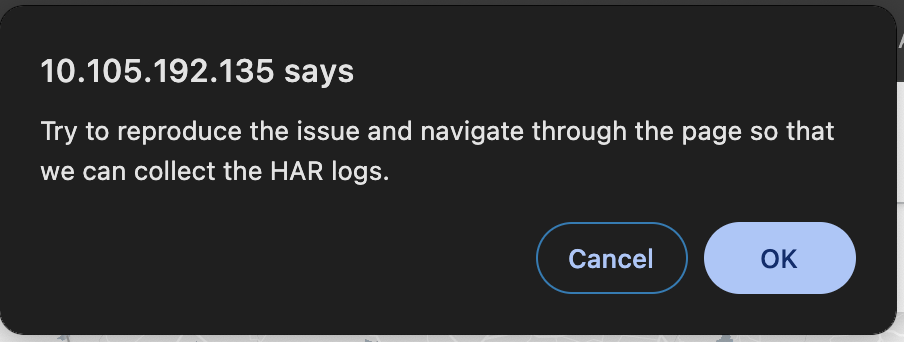
Step 2: A new pop-up requesting permission to continue will show up. Click on OK to start the HAR log collection.
Step 3: The HAR logs are being collected until the 'Stop Collecting' button in the following pop-up is clicked.

Step 4: As soon as the collection stops, a new pop-up opens up with the option to either upload the HAR file to an existing support case or to a new one.
Use Case 4: Uploading Troubleshooting Data to a Support Case
Steps to upload to a support case: Relevant troubleshooting logs can now be uploaded directly from the Catalyst Center to the Cisco support case. On multiple pages, the 'Upload to Case' button has been injected to ensure the required troubleshooting files of different types are pushed to the case hassle-free.
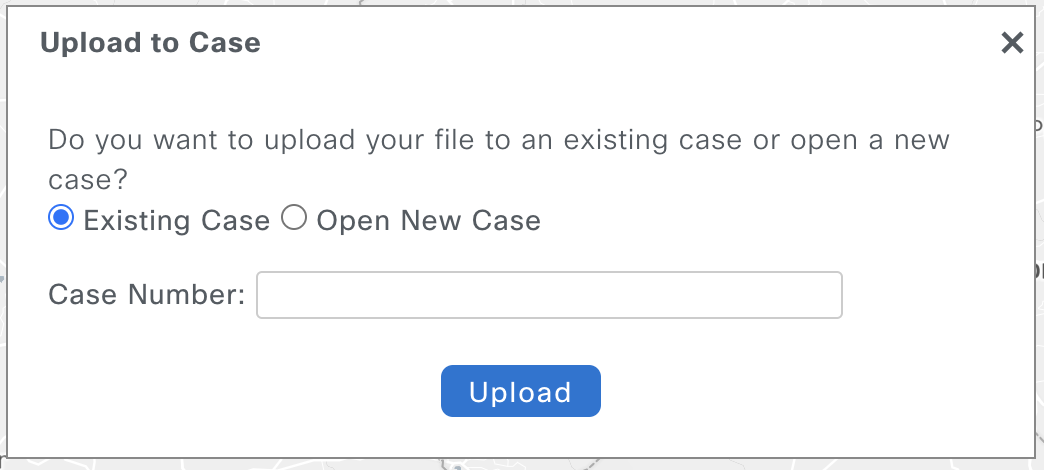
Step 1: On clicking 'Upload to Case', the following pop-up shows up requesting whether the file needs to be uploaded to an existing case or to open a new case with the files attached.
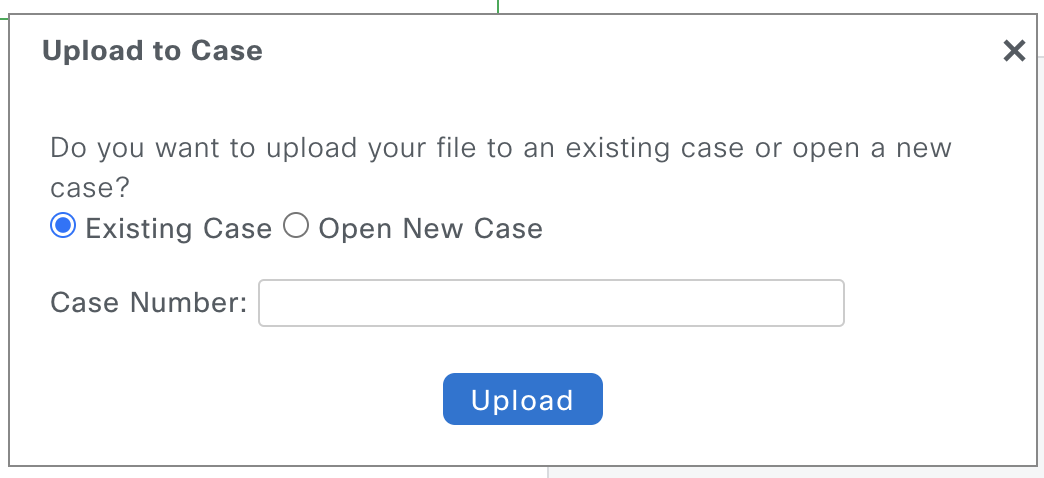
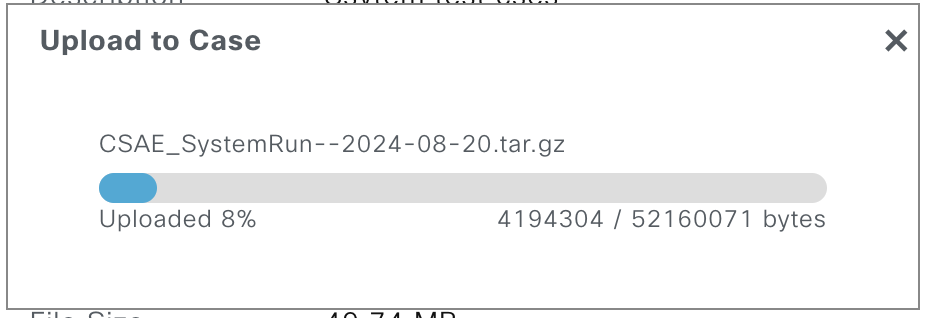
Step 2: On choosing the 'Existing Case', the files will be uploaded to an existing support case as an attachment. The following screenshots highlight the file upload process, including the validation.


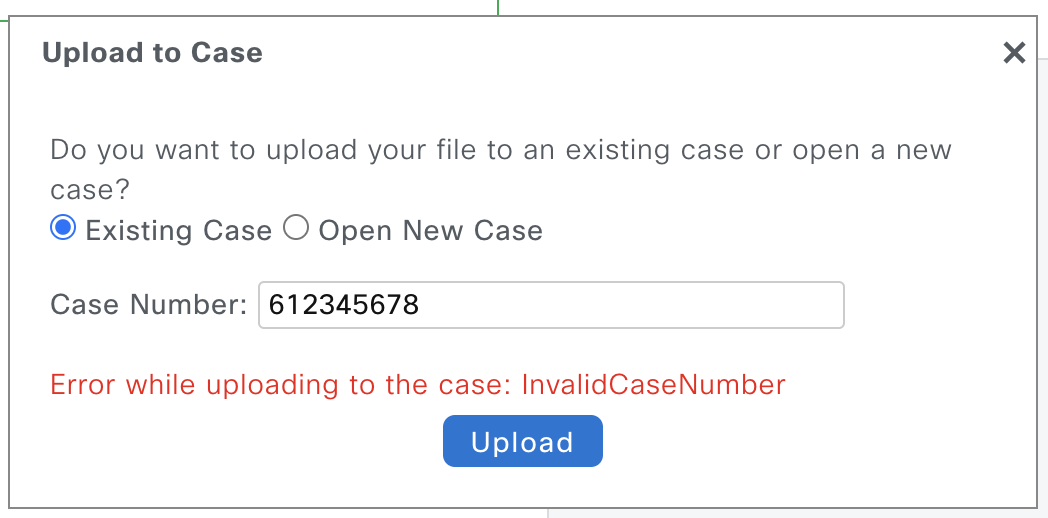
Note: The case number is validated prior to the upload. If an incorrect case number is chosen or if the case is in a closed state, the following error will pop up. Also, closing the pop-up during the file upload will stop the upload process.
The 'Upload to Case' button has been enabled at the following points in the Catalyst Center.
Command Runner
The command runner provides the option to capture commands from the devices managed by the Catalyst Center. The captured outputs from all the devices can now be uploaded directly to the case by clicking on 'Upload to Case' in the top right corner.

Direct link to access the command runner tool - https://<CatC_IP_Address>/dna/tools/command-runner
Reports
Reports that are ready for download can now be uploaded directly to the case by clicking on the 'Upload to Case' button next to the available report.

Validation Tool
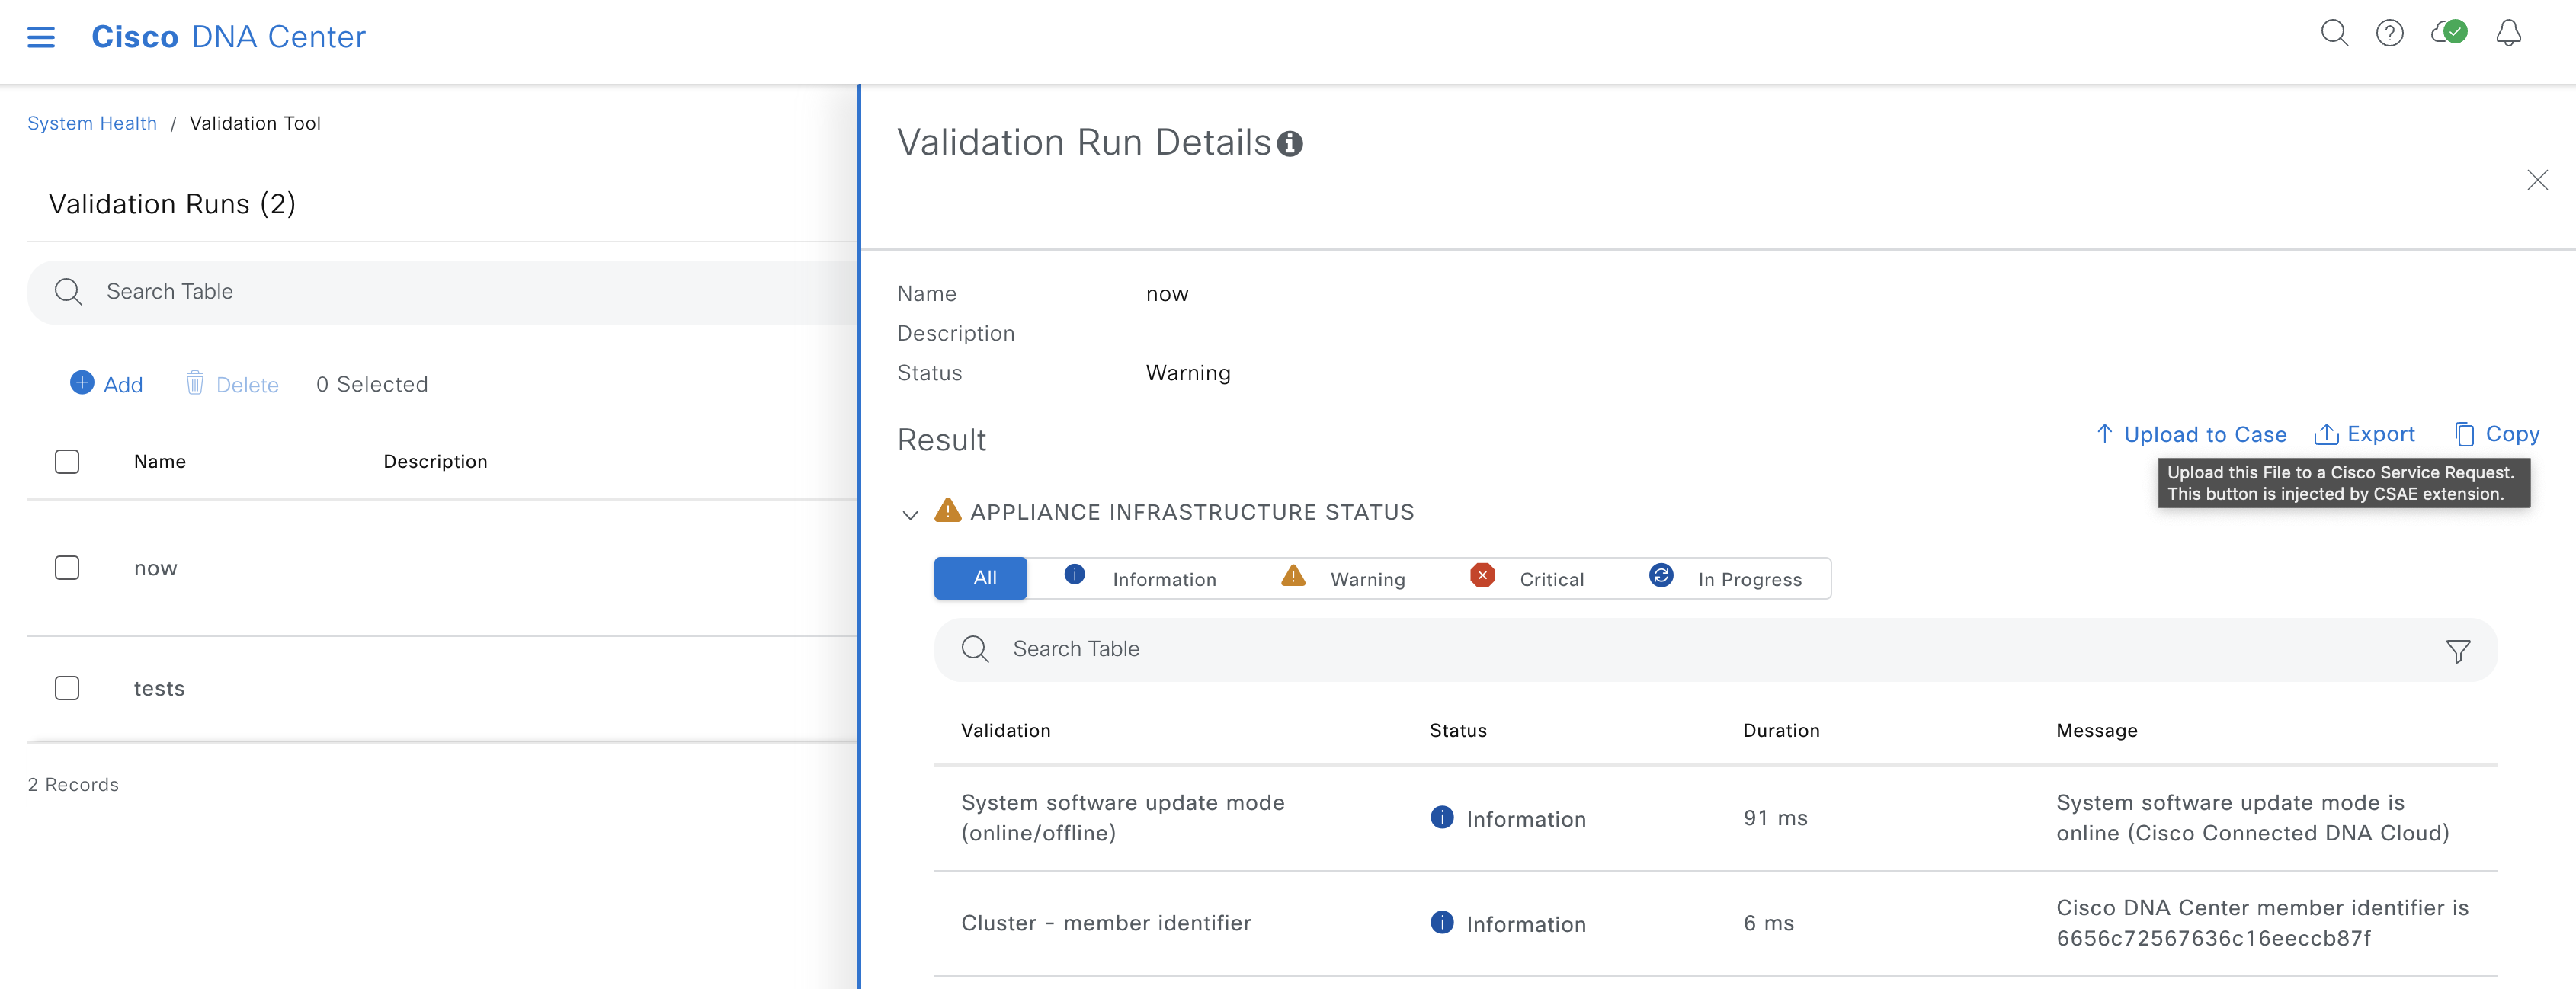
The validation tool performs multiple health, scale, and upgrade readiness checks. A set of checks are selected and executed on demand. The output for these checks is a PDF file listing all the executed checks and the results of these checks. The PDF file can now be uploaded directly to a support case by clicking on the 'Upload to Case' button.
System Analyzer
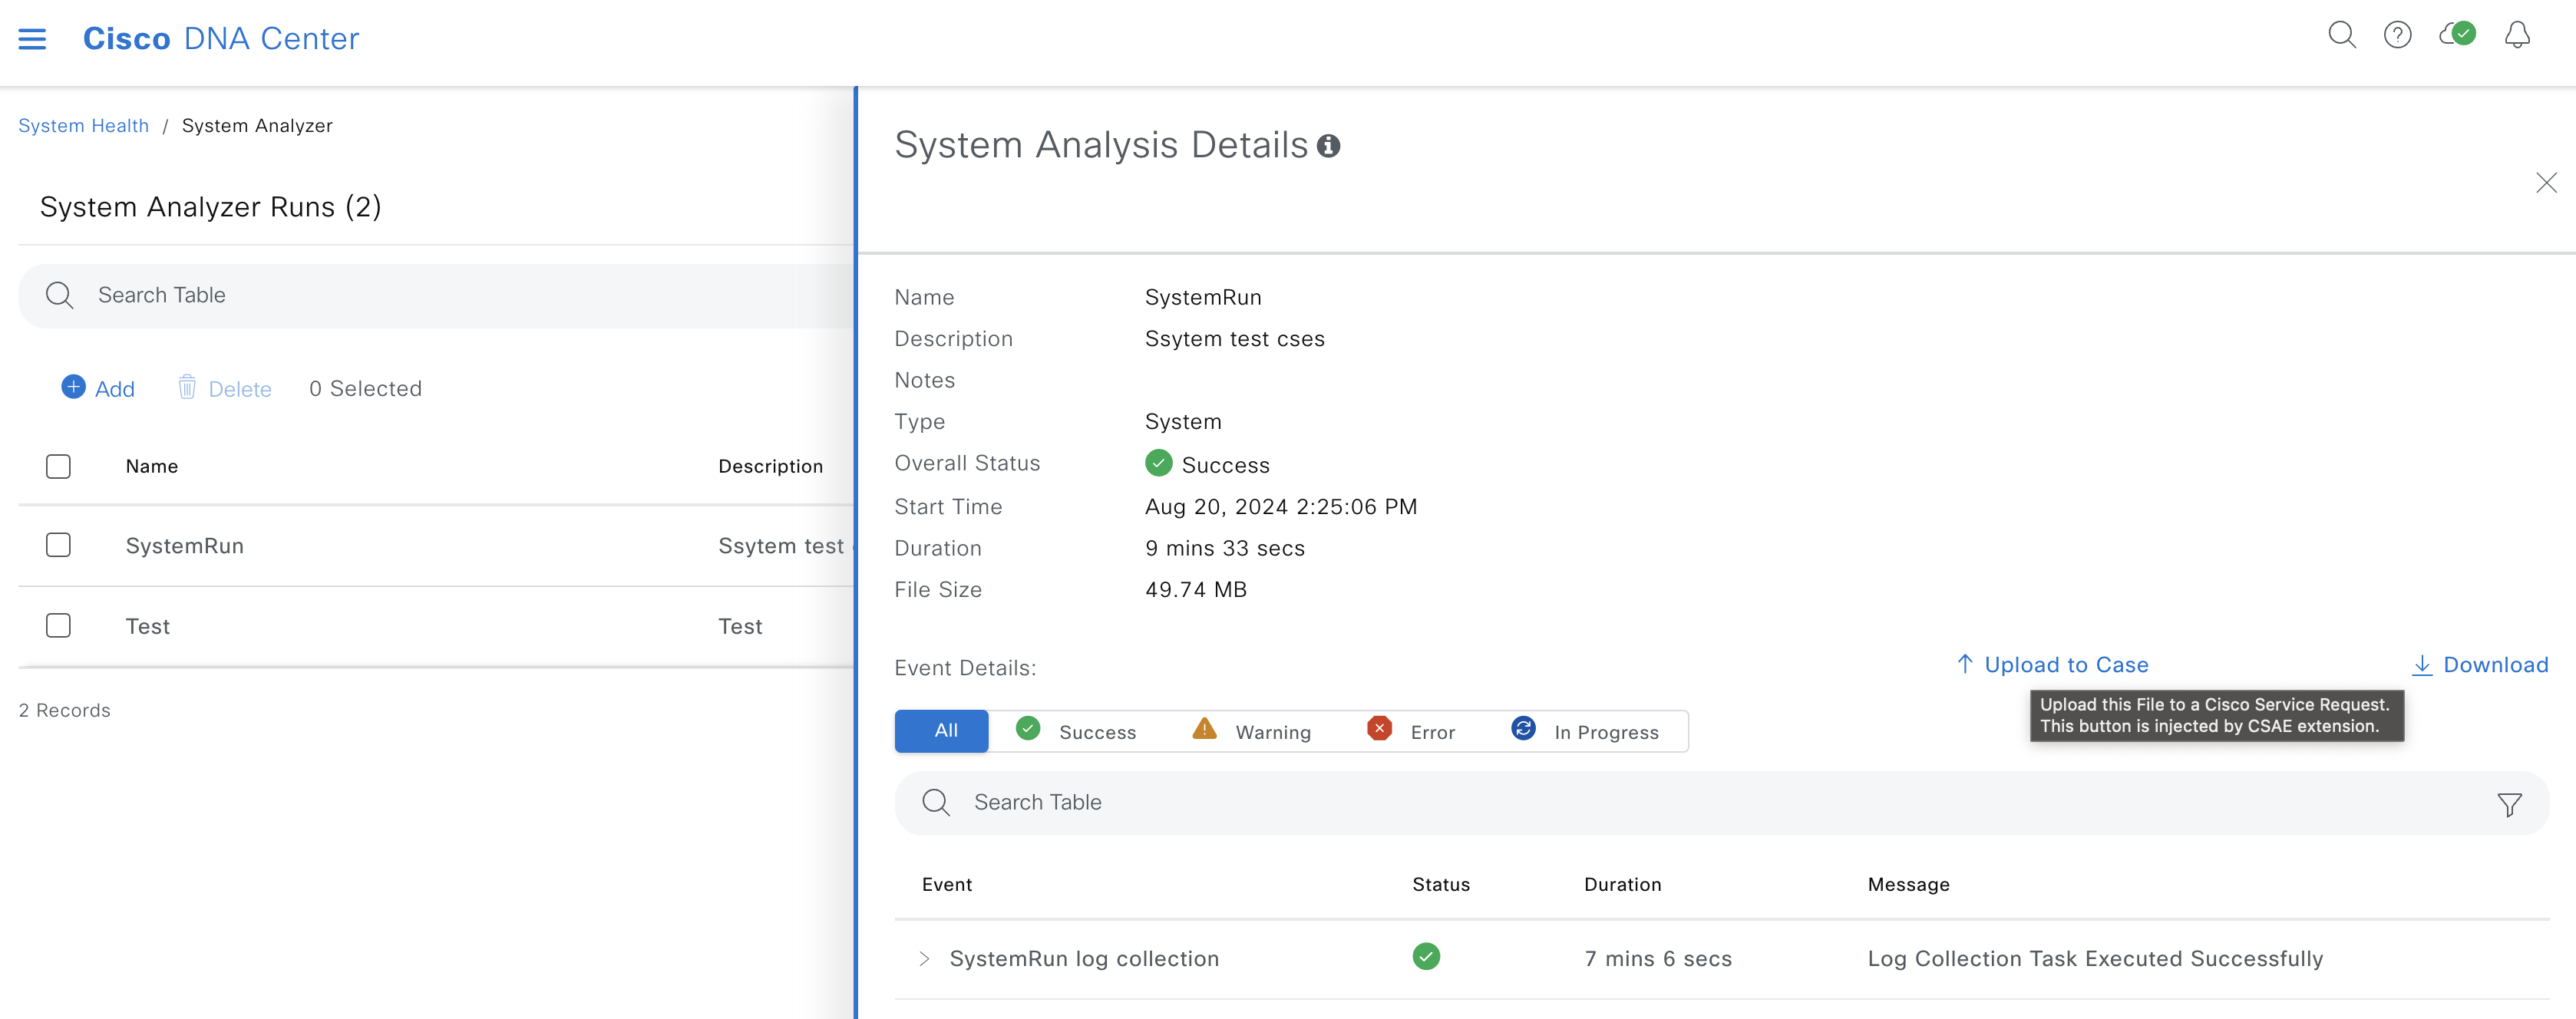
The System Analyzer tool generates a tar file of logs required for troubleshooting a specific feature of the Catalyst Center. The tar file can now be uploaded directly to a support case by clicking on the 'Upload to Case' button.
Network Reasoner - Wireless AP Data Collection
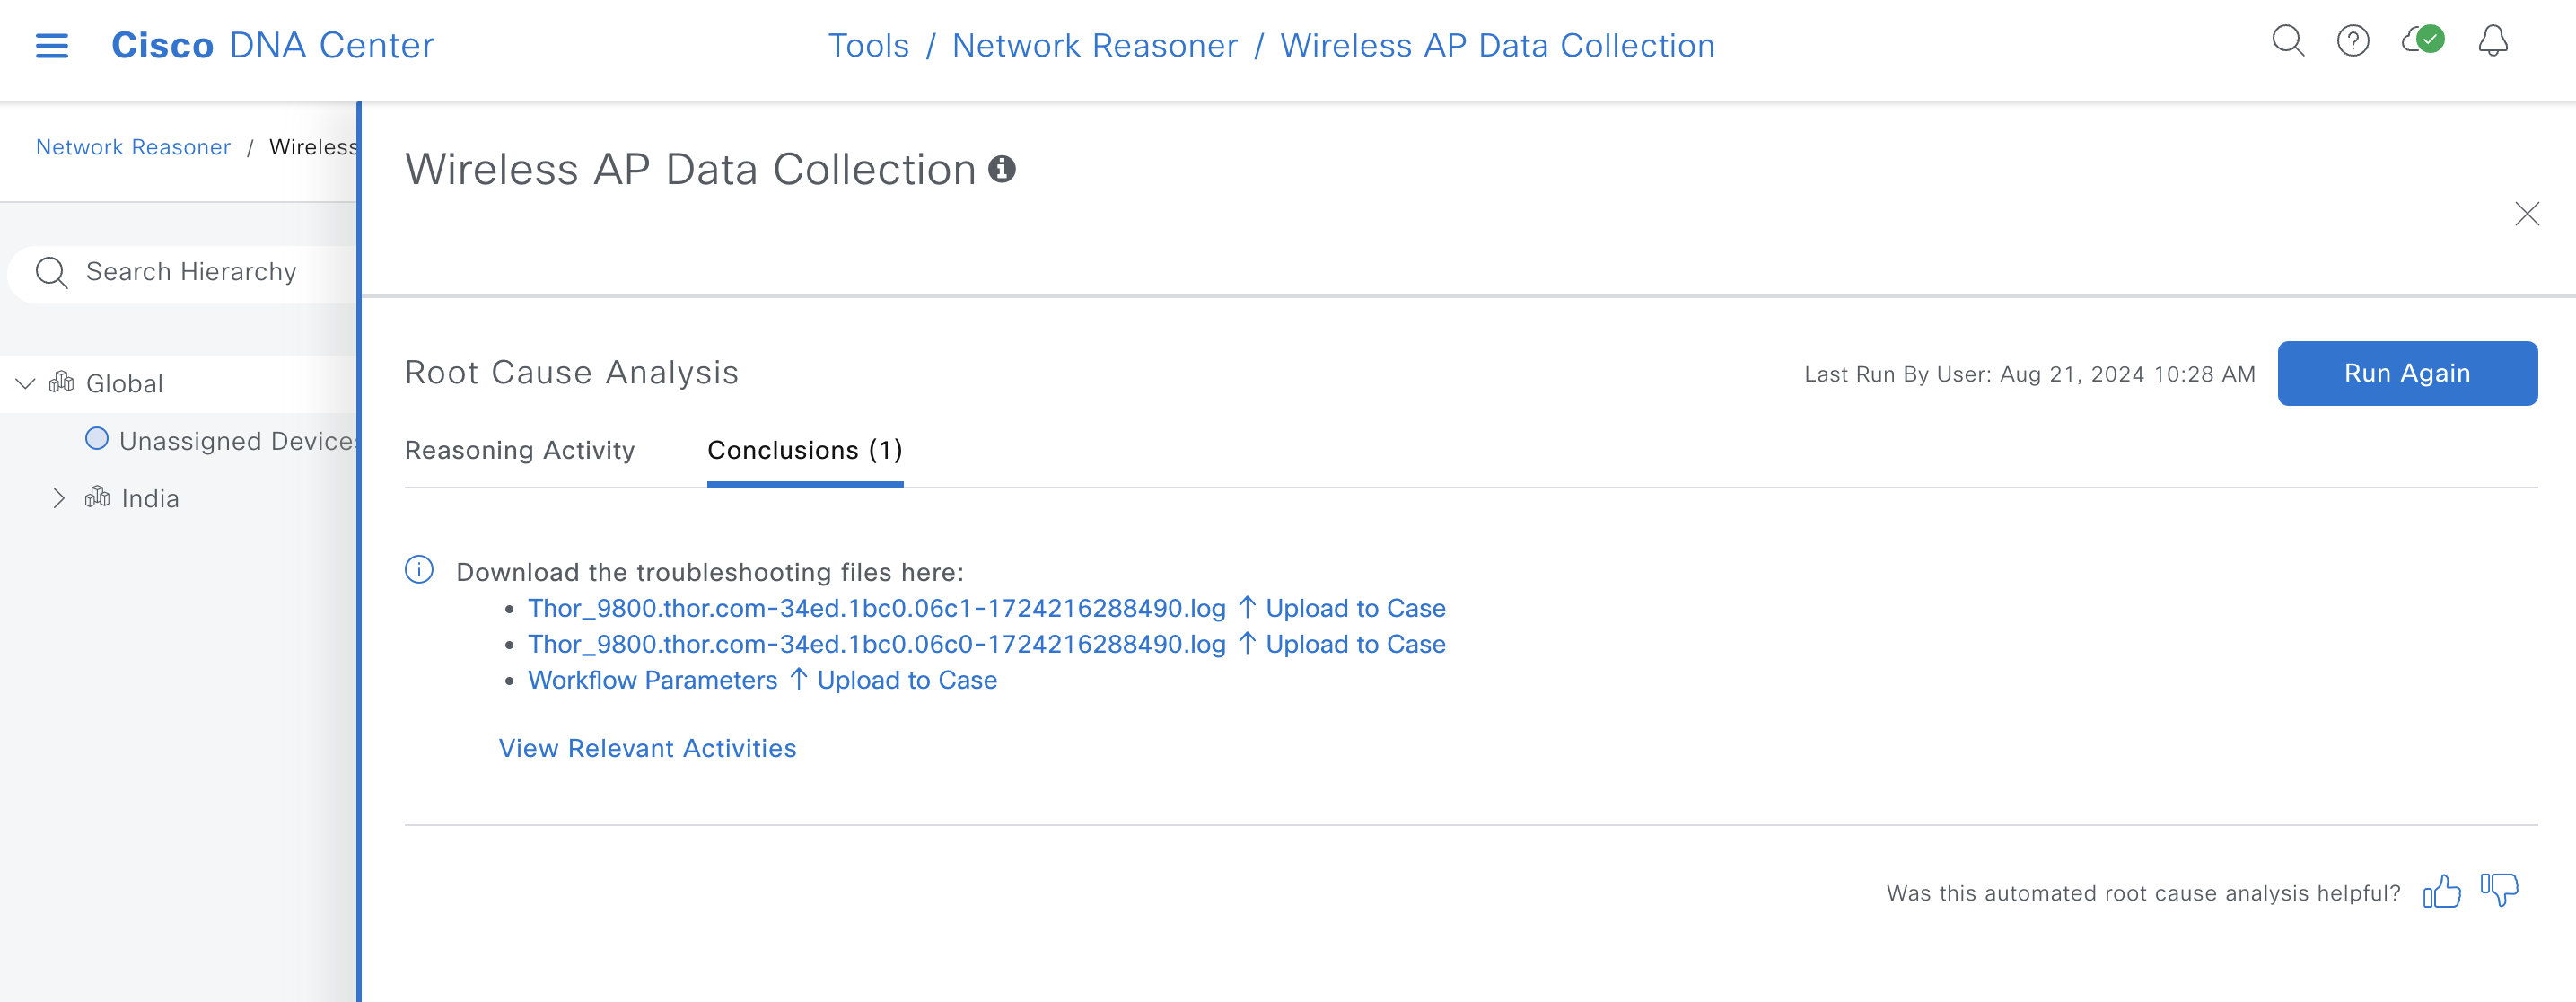
The Wireless AP Data Collection is one of the multiple workflows in the network reasoner or MRE. This workflow collects data required to troubleshoot wireless AP issues in the network. There are multiple files collected, and each file can be uploaded one by one directly to a support case using the 'Upload to Case' button present next to each file.
Network Reasoner - Wireless Client Data Collection
The Wireless Client Data Collection is one of the multiple workflows in the network reasoner or MRE. This workflow collects data required to troubleshoot wireless client issues in the network. There are multiple files collected, and these files can be uploaded directly to a support case using the 'Upload to Case' button.
Device Certificates
The device certificates can be downloaded from the settings page. These certificates can be uploaded directly to a support case using the 'Upload to Case' button.
